Reviving the coolest scanner you've never heard of
7557 words; 51 minute readIntroduction
Today’s digital cameras are nothing short of incredible when it comes to ease-of-use and image quality, and many take them for granted, myself included. For those of us in “generation Z”, though, it’s all too easy to be ignorant of what came before this now ubiquitous technology.
A semi-brief1 history
The rise of Photo CD
In the ’90s and early 2000s, getting film developed wasn’t exactly something for the average person to do at home. Instead, “minilabs” were a popular destination - you could take your film negatives to the local pharmacy, and in a reasonable amount of time, you’d have prints of your pictures!
Now, prints are wonderful, but in 1990 Kodak came up with a better idea - digitizing photos and putting them on CDs. Thus began the era of the aptly named “Photo CD.” Photo CD was an entire line of products dedicated to the digitization of photos, including film scanners and special Photo CD players. Photo CD enjoyed some popularity for a number of years, but ultimately faded away due to its various issues (much like Kodak’s other attempts at breaking into the digital photography industry.)
A new player enters the field
While Kodak’s Photo CD system languished, a relatively obscure company named Pakon was busy working on its own film scanner. It’s surprisingly difficult to find useful, confirmed information about Pakon, but public records and their first film scanner patent indicate that their scanner work likely began in the early ’90s.
Sometime around 2001, Pakon was acquired by Kodak. In the following years, Kodak would go on to release several models of Pakon film scanners - the F-135, F-235, F-335 and all their variants, collectively referred to as “F-X35.” These scanners came with a comprehensive software package for use in minilabs, and an SDK even existed to facilitate the development of specialized clients.
The F-X35 scanners boasted high performance, great image quality and post-processing techniques2, and relative ease of use. To say that they were popular would be an understatement - they found their way into minilabs all over the United States, including those in such major pharmacy chains as CVS and Walmart.
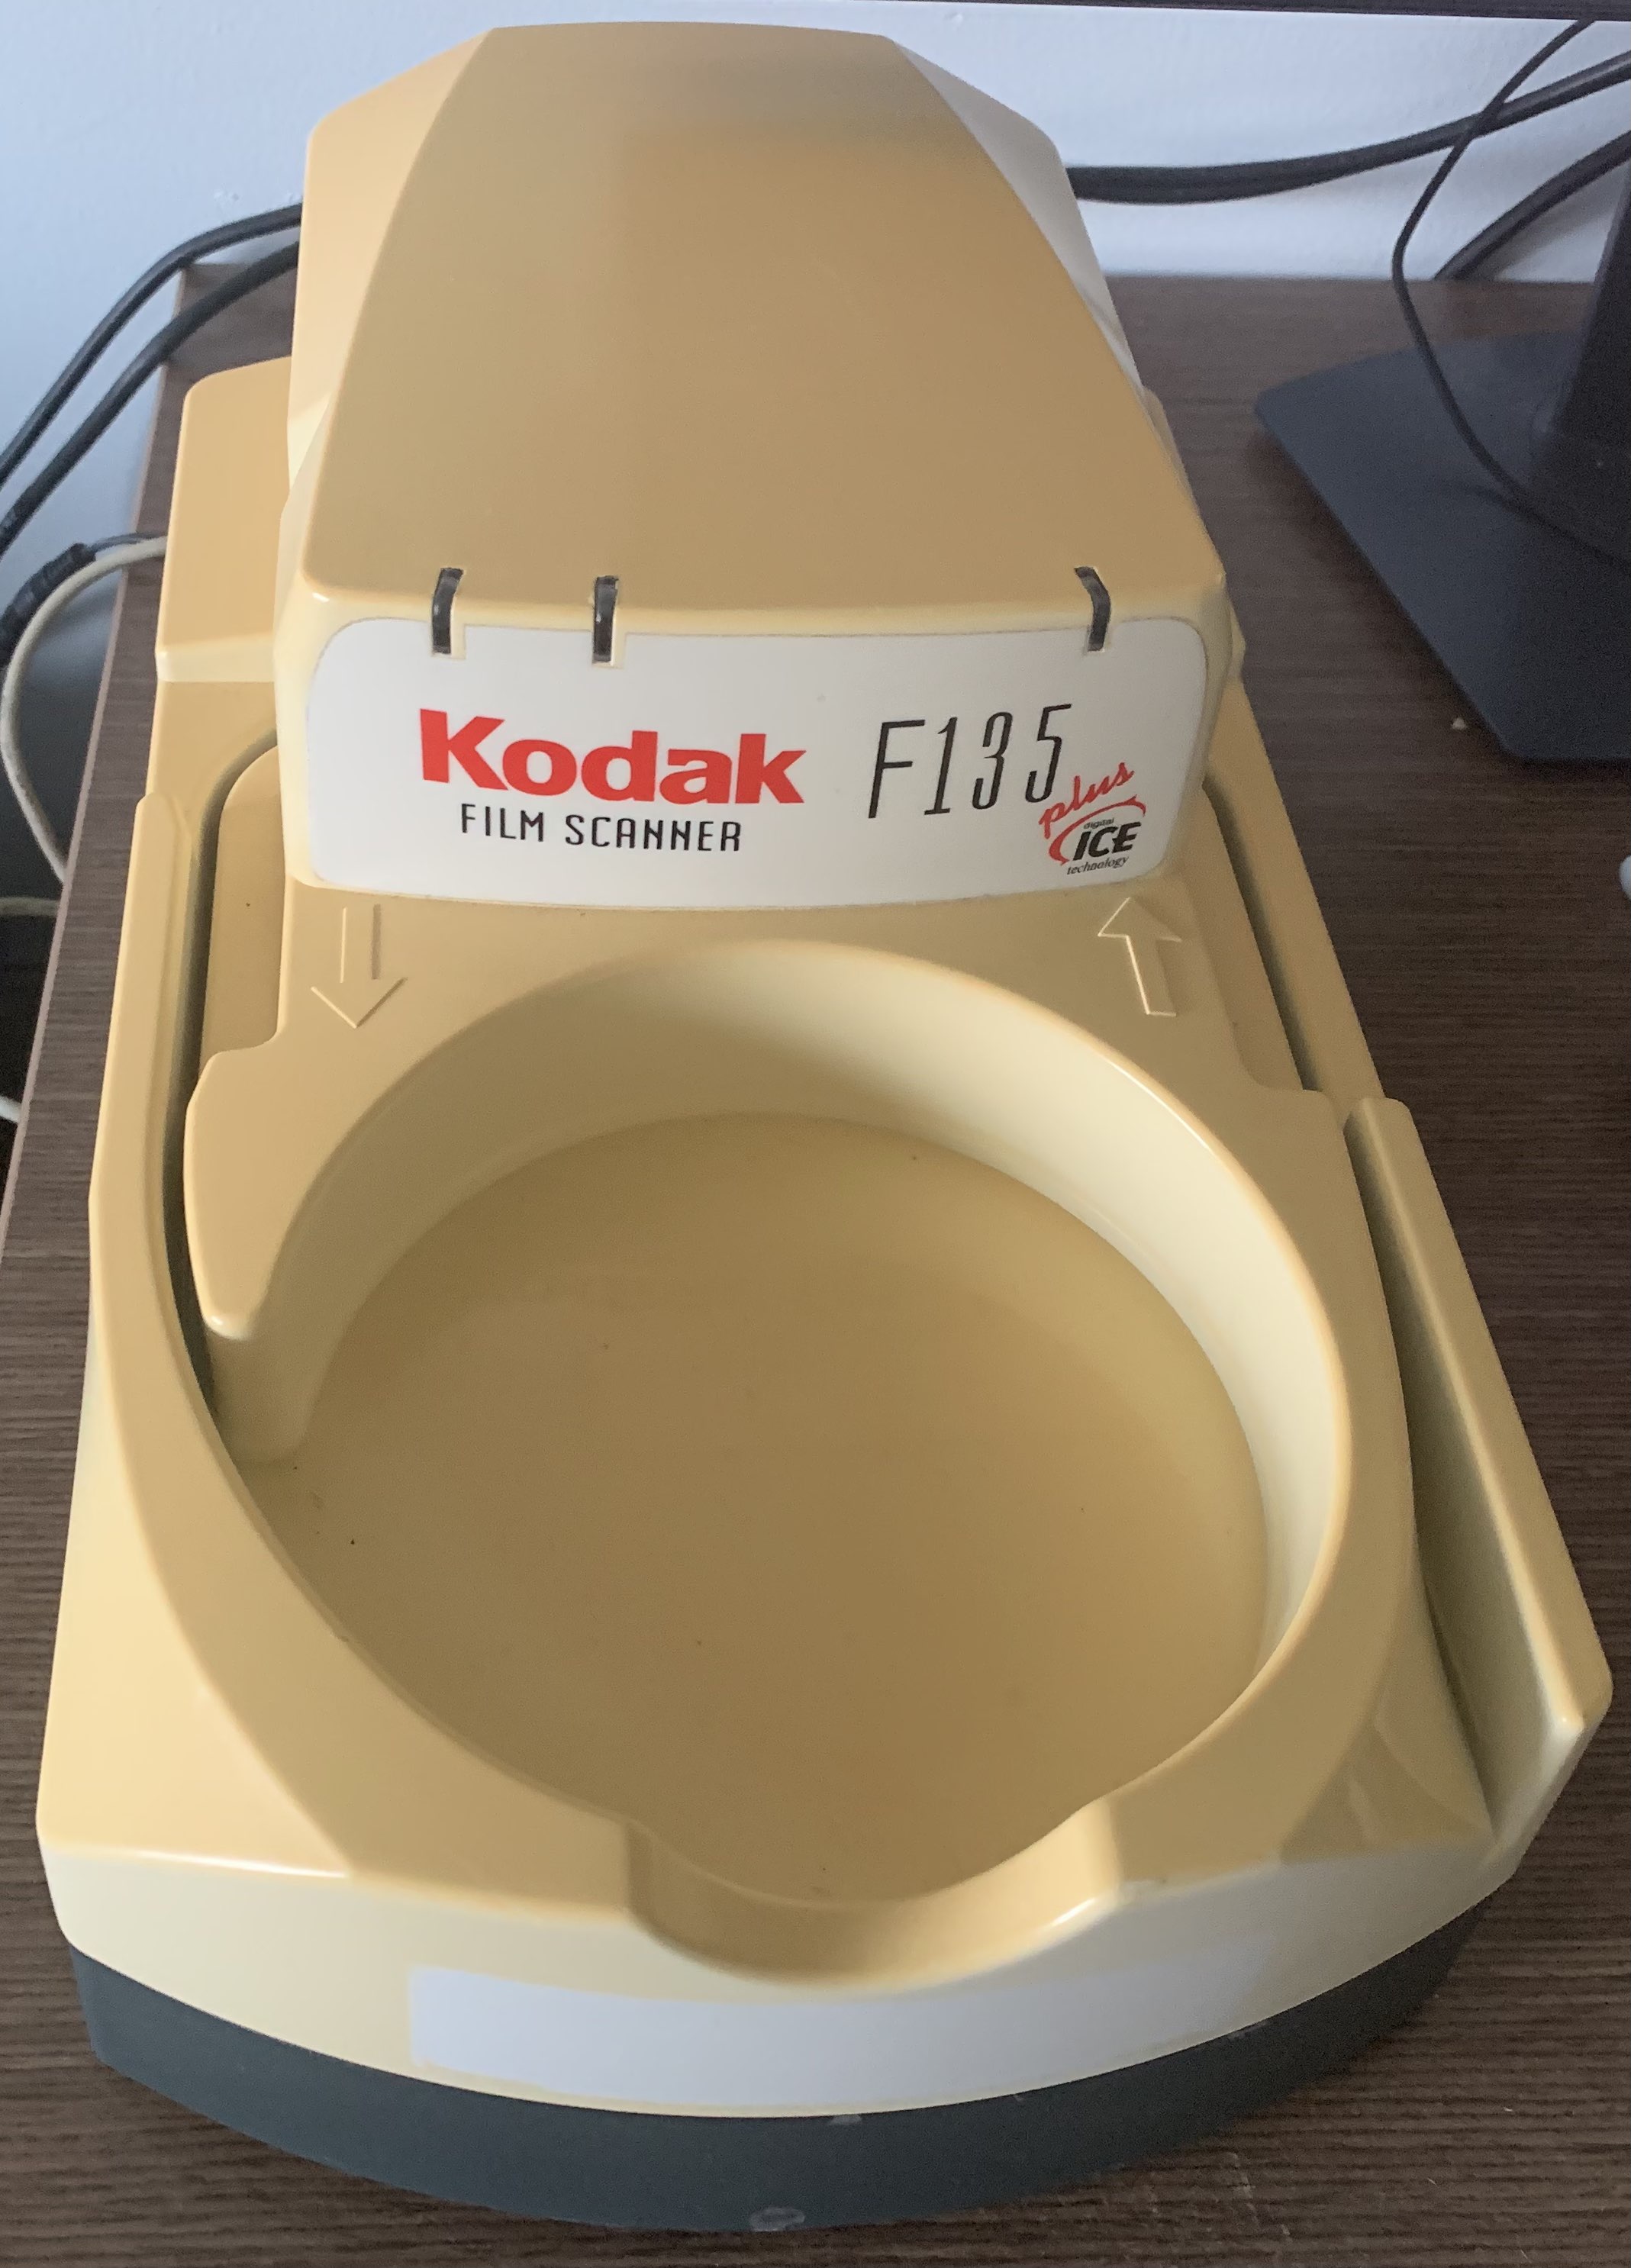 Added by popular demand: Here’s a picture of the scanner that I have access to: a Pakon F135 Plus. Yes, I know it says Kodak, but did you know that some units say Nexlab? It’s only slightly confusing.
Film can be loaded into the feeding mechanism on the right side of the scanner (see the arrow pointing up), and motors pull it through until it comes out on the left side (see the arrow pointing down.) The F235 and F335 have a completely different design, and I don’t have either one to take pictures of - I recommend searching for them on Google Images.
The fall (and rise) of Pakon
Sadly, Pakon’s business met an untimely doom as the digital photography industry became dominant, and the company filed for bankruptcy in 2012. While there was still some demand for film scanning, there wasn’t enough demand, and pharmacy minilabs were scaled down. Amazingly, the scanners didn’t go to waste - hobbyists picked them up for pennies on the dollar, and a new community was formed. Today, a Facebook group dedicated to the Pakon scanner line boasts over 6,000 members, with a fair amount of weekly activity.
Pakon, today
With the software readily available, and the hardware being available as well (albeit for a pretty penny - some scanners go for as much as $2500), one would assume that the story ends here. Surprisingly, it doesn’t - for reasons we’ll explore together, the final version of the software is only usable on 32-bit Windows XP! To make matters worse, setting it up tends to be extraordinarily difficult for anyone who doesn’t have a sacrificial computer - in that case, a virtual machine is necessary, which makes everything more complicated and extremely error-prone.
Why does this even matter?
I’ll be honest - I’m not a photographer, and I personally have no reason to use a Pakon scanner. I happen to have access to one, though, and when I learned about its status as a user’s nightmare, I felt like taking a look. As a college student who is particularly interested in software preservation and reverse engineering, these scanners appealed to me - it turns out that people still want to use them despite their difficult nature, and I was interested in making that easier.
“But why would anyone still want to use this?”, you might ask. Sure, there are other film scanners that come to mind - Epson makes their own, Nikon used to make their Coolscan scanners, and there are countless others available. Any of these options are perfectly fine, and in fact, some are even better than the Pakon in terms of technical specifications. Where Pakon scanners truly shine is in their seamlessness - unlike other scanners that require film rolls to be pre-cut into strips, the Pakon will accept entire rolls, and does everything for you: detecting frame edges and cropping images appropriately, performing color correction that actually works, reading DX codes if they’re available, and finally, giving you a set of high-quality, effectively noise-free scans. It does all of this at breakneck pace, too. While there are other film scanners, none of them that I’m aware of can even come close to the Pakon’s convenience.
The ideal outcome for most of these users would be one where the Pakon scanner software is usable on modern versions of Windows, running on modern workstations - no more sacrificial laptops running 32-bit XP, and no more VMs that are slower than a tortoise.
Now, finally, let’s see how we can make that happen. Extremely technical content ahead!
Glossary
TLA, B and C: Client libraries for the F-235, F-135 and F-335 scanners respectively.
TLX: A wrapper around TLA, B and C. It is the Pakon scanner SDK. (TLA originally held this title, and then TLB and TLC came along.)
PSI: Pakon Scanning Interface. All-in-one desktop app for minilabs to run scans, make CDs, and do all sorts of other things.
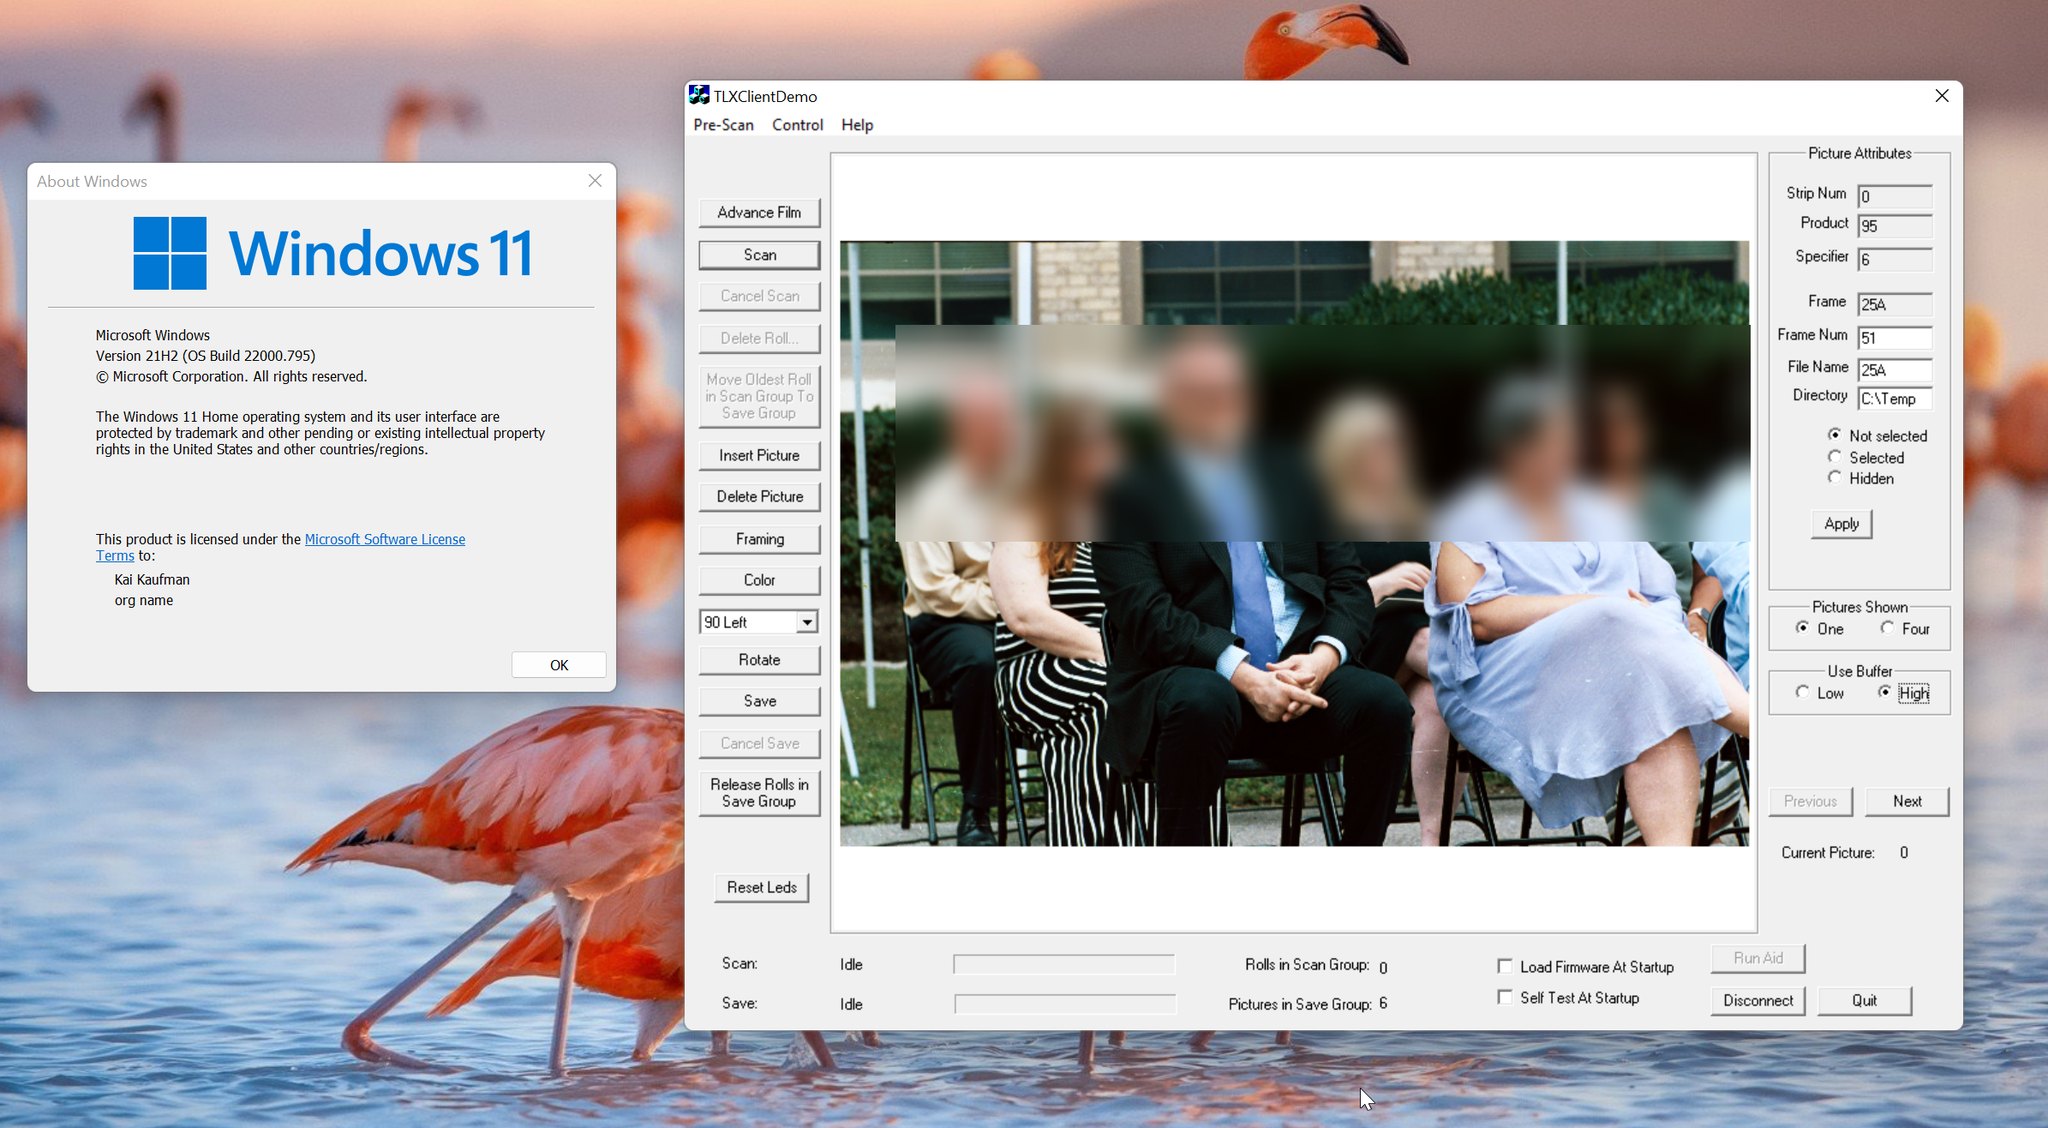
TLXClientDemo: A much simpler interface that was meant to serve as a demo for the TLX SDK. It allows the user to control every setting and pretty much do whatever they want within the confines of the SDK. This app is also sometimes referred to as just “TLX”, which isn’t confusing at all!
User-mode: Refers to code running in “userland” - for simplicity’s sake, think of this as the desktop environment that you interact with and run applications in. Anything in userland is subject to various safety checks and interventions to ensure that the entire system can’t be brought down by a single program crashing.
Kernel-mode: Refers to code running at the kernel, or operating system level. User-mode safeguards don’t exist here, and many errors can cause the entire system to crash. On Windows, crashes of this nature trigger the notorious Blue Screen of Death, or BSOD.
Anything not explicitly defined here or anywhere else in this article is assumed to be known by those who choose to read further. If you don’t know, your search engine of choice should come in handy - but in general, I won’t throw anything too obscure at you without explaining it myself.
Getting to work - a compatibility investigation
What are we targeting?
Any external hardware that you want the operating system to be able to interact with requires a driver. At a high level, the driver is responsible for accepting commands from the operating system (often on behalf of the user) and processing them in some well-defined way. On Windows, devices exist as fake files (similar to Unix’s rule of “everything is a file”) that user-mode applications can interact with. These fake files are set up by device drivers.
Since Windows has an astonishing compatibility track record for “normal” software, and we’re dealing with some rather obscure and unique hardware that requires a special driver, we can guess that the driver is going to be the source of any issues that come up. To verify this guess, we just have to try running a scan on a 32-bit version of Windows that’s not XP. In my own tests, I went with Windows 10, and as soon as the scanning software was starting to actually do something…
(pause for dramatic effect)
The system crashed, shocking absolutely nobody, but greatly disappointing me. Just getting Windows to recognize the scanner’s very existence was a minor production, the details of which I’ve chosen to omit because of how boring they are in comparison to everything else. In the end, if it were as simple as manually installing some drivers, it’s very likely that someone would’ve figured it out years ago. Onward!
Isolating the problem
In order to determine why the entire system crashes, we’ll have to use a kernel debugger. I went with WinDbg, mainly because it actually works (which is more than can be said of certain other debuggers), but also because I’m already somewhat familiar with it from past kernel adventures.
After a bit of setup, my testing virtual machine was all set for debugging. A few minutes later, and round 2 of testing began…
REFERENCE_BY_POINTER (18)
Arguments:
Arg1: 00000000, Object type of the object whose reference count is being lowered
Arg2: 8d704d2c, Object whose reference count is being lowered
Arg3: 00000001, Reserved
Arg4: ee751000, Reserved
We got our first bug check! Bug checks normally lead to BSODs, but now that we’re using a kernel debugger, we can take a look around before restarting the system. A bit more analysis (powered by WinDbg’s !analyze command) reveals that a call to ObfDereferenceObject at F135usb2.sys+0x1db4 is to blame.
If you have no idea what that meant, I’m happy for you. You’ve spared yourself the immense mental pain that comes with trying to figure out how any of this actually works. Now it’s time to go down the first of many rabbit holes - what is ObfDereferenceObject, what is it meant to do, and why is it catastrophically failing?
Kernel lore - what are we looking at here?
First and foremost, for reasons that are unclear to me, ObfDereferenceObject is exposed to driver developers through a macro3 called ObDereferenceObject. I don’t understand what the point of this even is, but in any case, we can find the documentation for the macro here.
The
ObDereferenceObjectroutine decrements the given object’s reference count and performs retention checks.void ObDereferenceObject( [in] a );
[in] a: Pointer to the object’s body.
This doesn’t seem all that complicated. Before moving on, though, we should make sure we know what an “object” is in this context. According to Microsoft documentation:
An object is a data structure that represents a system resource, such as a file, thread, or graphic image. Your application can’t directly access object data, nor the system resource that an object represents. Instead, your application must obtain an object handle, which it can use to examine or modify the system resource. Each handle has an entry in an internally maintained table. Those entries contain the addresses of the resources, and the means to identify the resource type.
So, essentially, an “object” in the Windows kernel is just a resource of some sort that can have data associated with it. Furthermore, the “reference count” mentioned earlier is the number of times some bit of code has said “I care about this thing, don’t let it go away!” by using one of the functions in the ObReferenceObject family, which we’ll learn more about later.
Let’s move on - we’re taking the scenic route with figuring out this crash. The ending will shock you.
Reverse engineering the driver(s)
When trying to fix something, it’s often necessary to actually understand it. This is where reverse engineering, or “reversing” skills come in handy, and I was up to the task. Since I was doing my tests with an F-135 scanner, I focused on the F-135 drivers, consisting of 3 files:
F135usb2.sys: The device-specific driver.F235Ldr.sys: A firmware loader driver that is shared by all scanner models.F235Lib.sys: A “framework” driver that is also shared by all scanner models.
Recon
Whenever I reverse engineer software, my first goal is to identify code that came from somewhere else - whether that’s OpenSSL or the sample CD included in an obscure book, I want to know what I can avoid painstakingly reversing. This time was no different, and I got to work trying to figure out exactly what I was looking at.
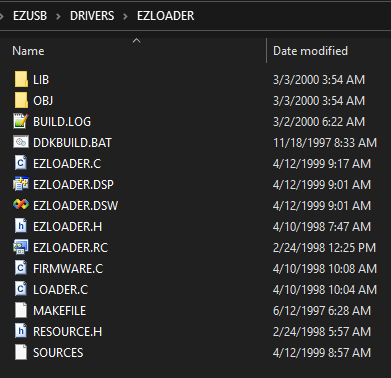
First, I took a look at F235Ldr.sys. Interestingly, it came with a little bit of useful information:
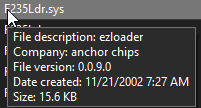
This gave me a real lead to follow. A bit of additional research revealed that the “ezloader” component was part of the “EZ-USB” kit sold by a company called Anchor Chips4. Surprisingly, I was able to find one of these kits on eBay, and a few days later, it arrived:
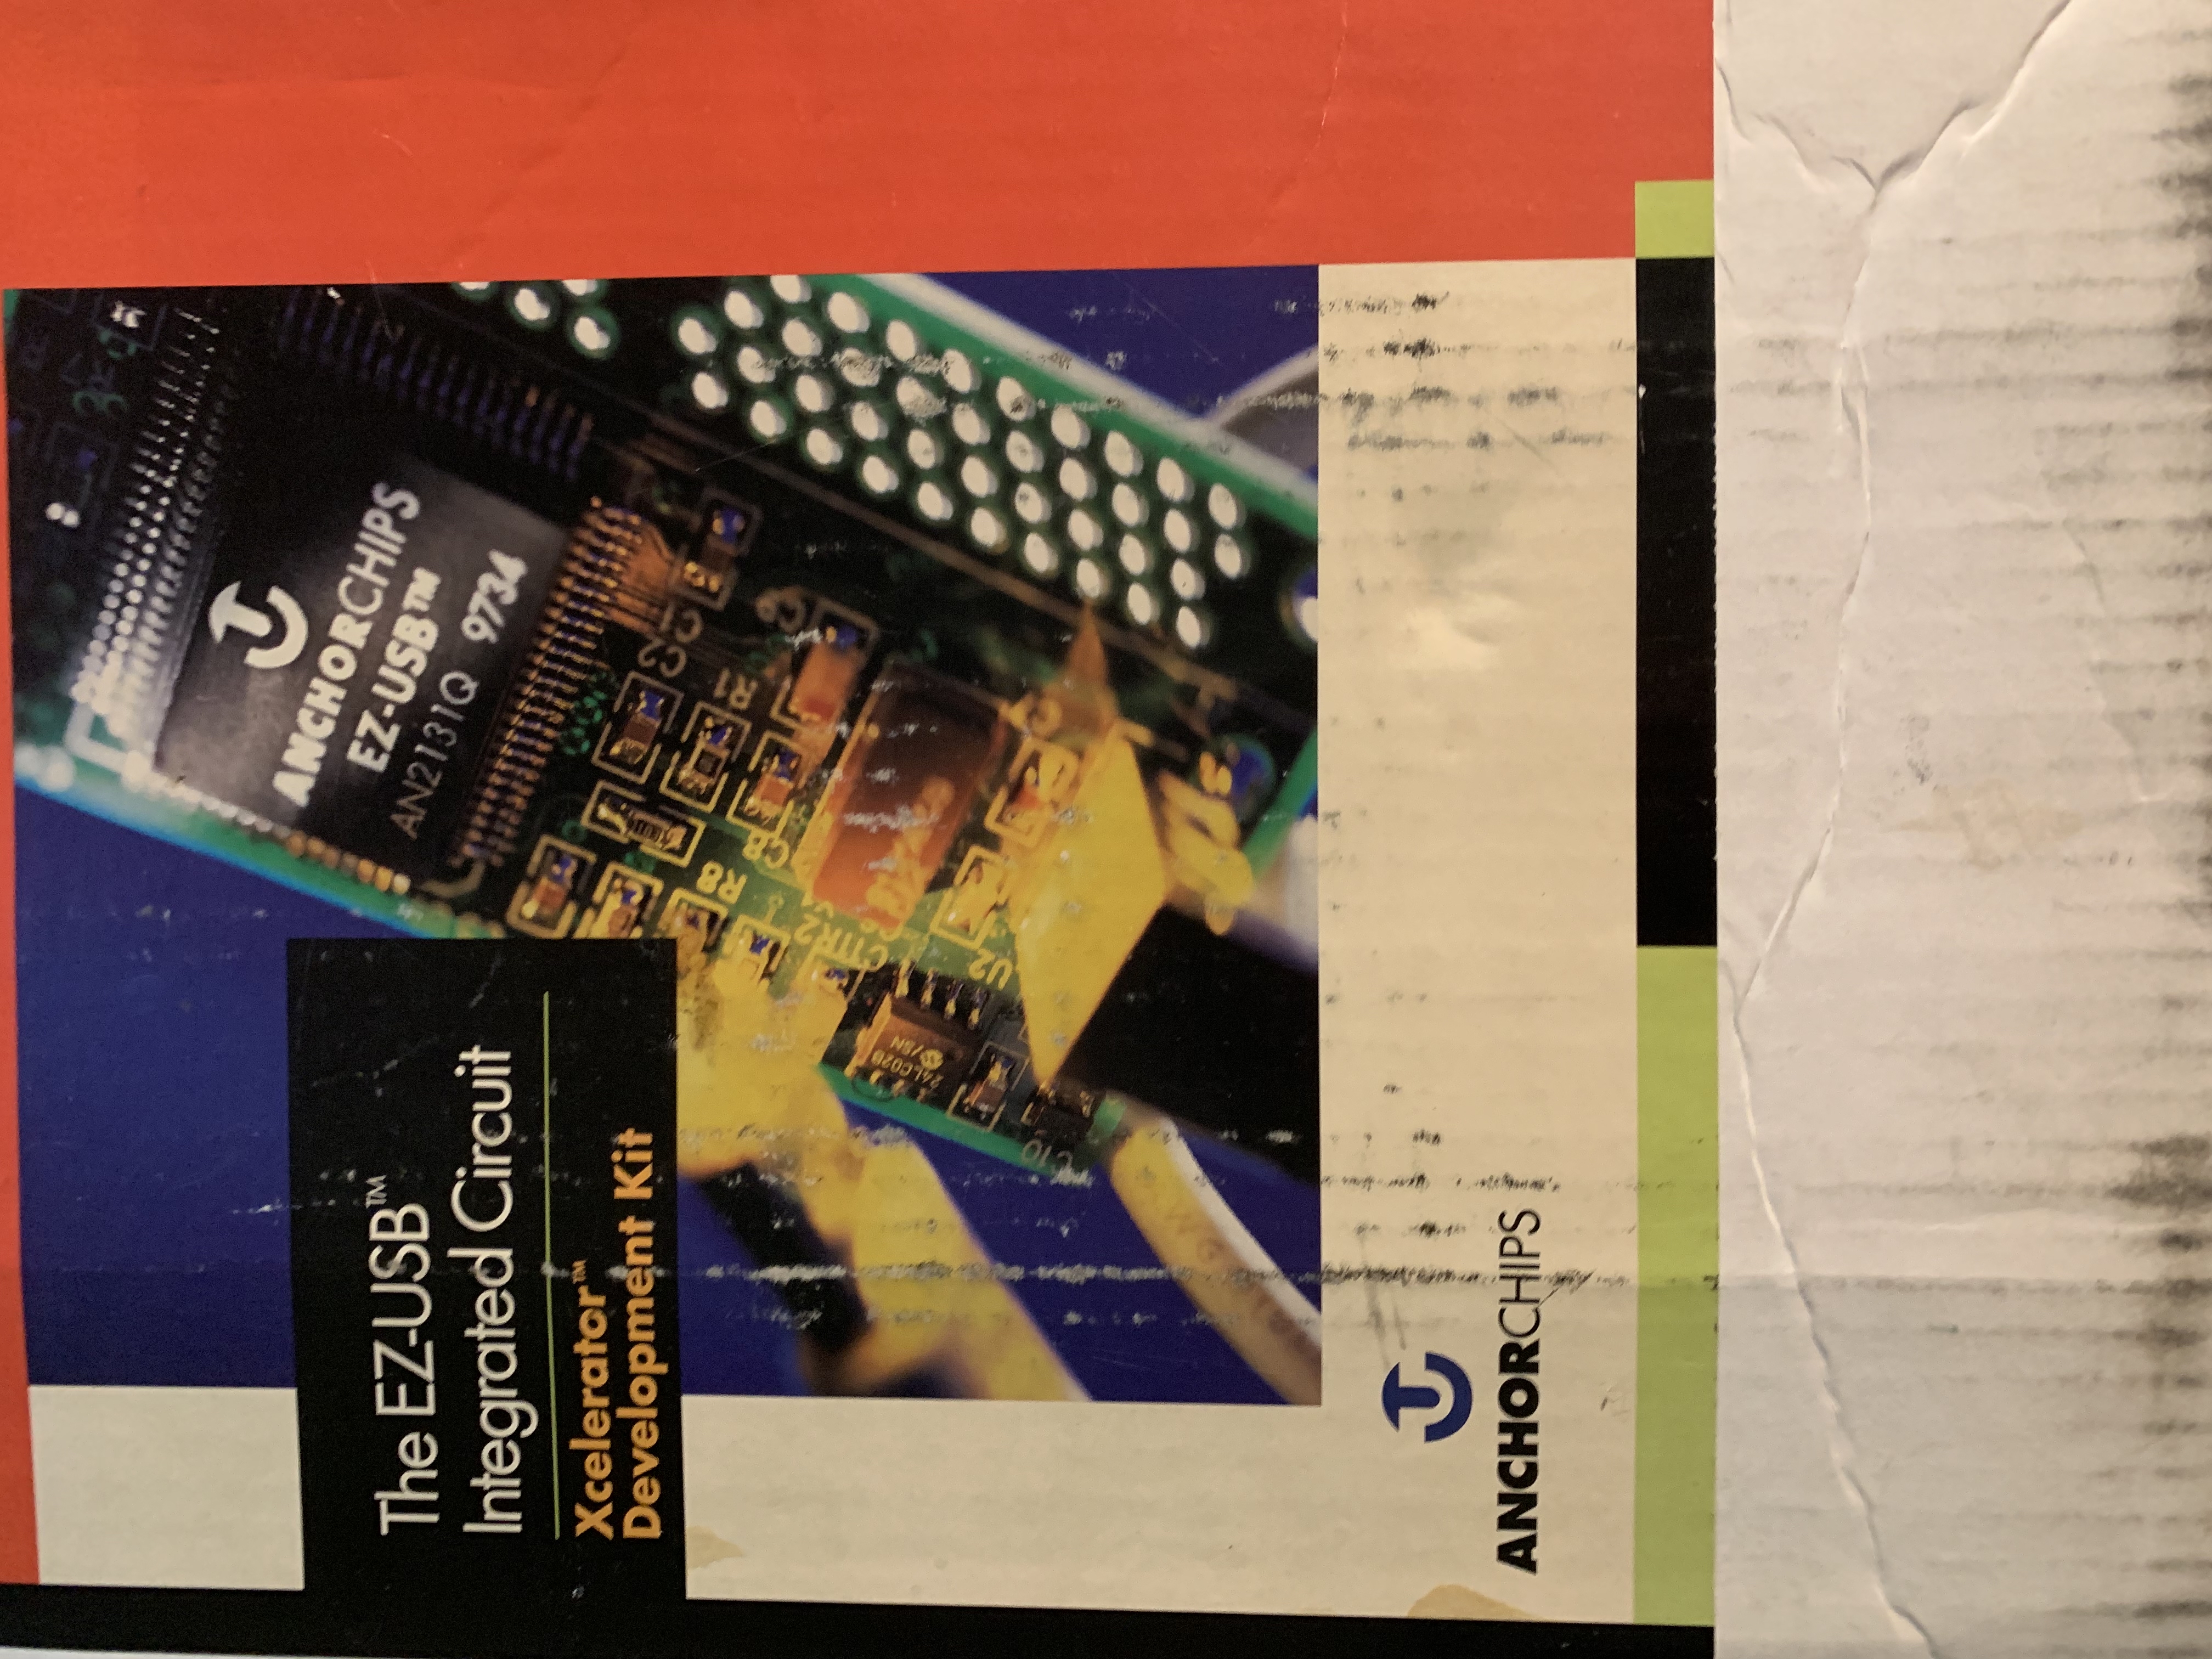
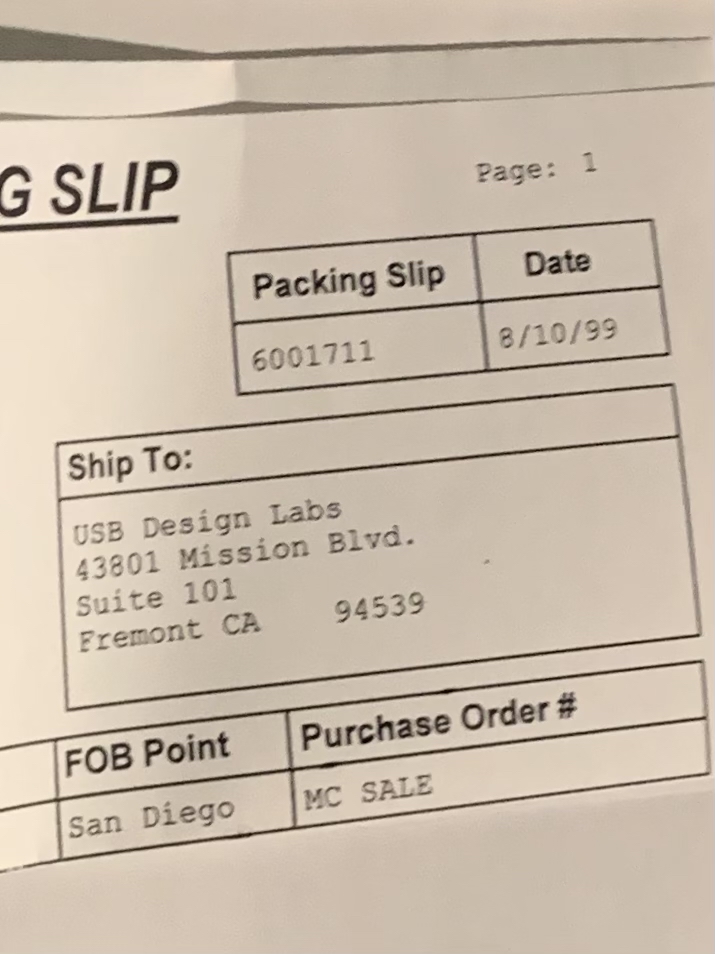
Amusingly, the package had never actually been opened, and contained the original packing slip… with a date several years before I was born, addressed to a company that I don’t think exists anymore.
The package contained lots of hardware, some books, and best of all, two CDs with software and documentation! After a quick search, I found what I was looking for: the source code to ezloader.
The story of F235Ldr.sys doesn’t quite end here, though. I wanted to make sure that the code I got from the CD was the same as the code in the compiled driver. To do this, I would have to look at F235Ldr.sys under a microscope. My binary microscope of choice is IDA Pro with the Hex-Rays Decompiler.
After browsing around F235Ldr.sys in IDA, and comparing the code to the ezloader source code, pretty much everything seemed identical. There was one difference, however: the version provided by Anchor Chips requires the device firmware to be embedded into the compiled driver, while the Pakon version reads firmware from Intel HEX files. This was almost certainly done to facilitate the sharing of the driver among all of the different scanner models. No other significant code changes were made.
While reversing this driver from scratch would not have been difficult, I was happy to have saved some time.
My next target was F235Lib.sys, which proved to be somewhat more challenging to identify. It, too, had publisher information:
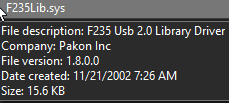
I have to say, I never would have thought that a driver called F235Lib would be the “F235 Usb 2.0 Library Driver.” Since this information is practically useless, we’ll once again have to examine the file under the microscope.
Upon loading F235Lib.sys into IDA, I noticed it exported several functions, as would be expected of a library:
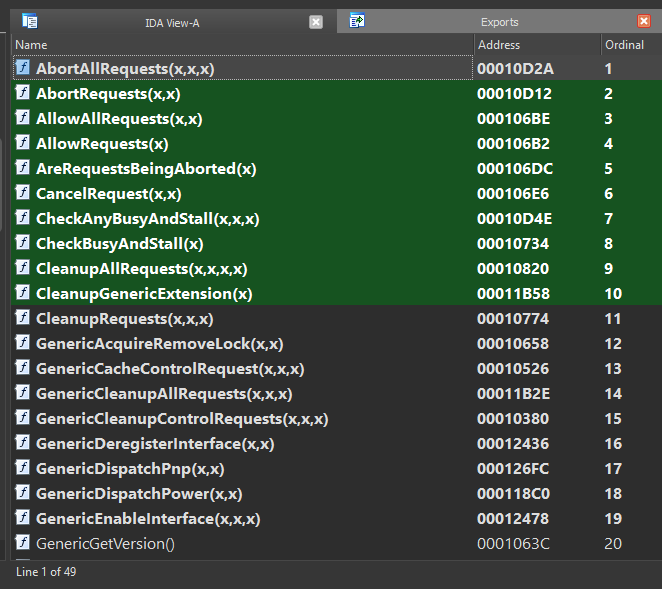
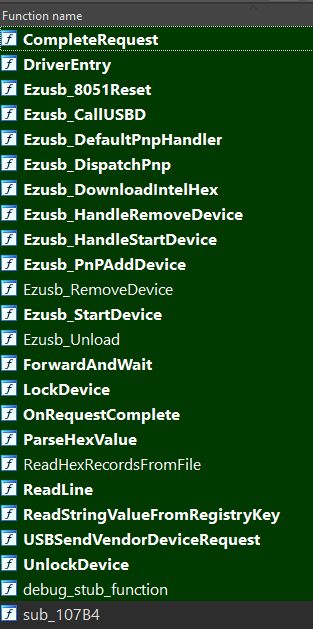
I didn’t notice anything that obviously came from somewhere else, and looking at the list of strings in IDA (much like running the strings command on the file) didn’t reveal anything either. So I got to work reverse engineering all the different functions, aided somewhat by the presence of these exported function names - about half of the functions in the driver were named, and the other half were unknown.
I made a good amount of progress before I decided to make one last attempt at figuring out if there was more to the story. I searched for the name of one of the functions - GenericHandlePowerIoctl - and found a match on GitHub. I noticed the name “Walter Oney” at the top of the file:
// Power request handler for Generic driver
// Copyright (C) 1999 by Walter Oney
// All rights reserved
// @doc

#include "stddcls.h"
// ...
My next search was for “Walter Oney USB”, as I figured this individual had probably (read: definitely) worked on device drivers. That led me to a book called “Programming the Microsoft Windows Driver Model”, written by Oney and published by Microsoft as the official how-to guide for Windows driver programming.
A further search for “Programming the Microsoft Windows Driver Model” led me to the published sample code from the second edition of the book. And sure enough, there was an entire “generic” driver included, with all of the functions that I had found within F235Lib.sys. Although I was somewhat disappointed to find some differences between the published sample code and the compiled code I was looking at, I realized that they could all be explained by the passing of time - the sample code I had obtained was from the second, not first edition of the book, and for that reason was likely younger than the Pakon driver.
Despite this surprise, I was able to match almost all functions and all data structures in the compiled F235Lib.sys driver to the sample source code. The Hex-Rays decompiler really came in handy here. As an aside, just look at this sample decompilation:
NTSTATUS __stdcall SequenceCompletionRoutine(PDEVICE_OBJECT junk, PIRP Irp, PPOWCONTEXT Context)
{
  Context->status = Irp->IoStatus.Status;
  HandlePowerEvent(Context, AsyncNotify);
  IoFreeIrp(Irp);
  return STATUS_MORE_PROCESSING_REQUIRED;
}
and compare it to the original code:
NTSTATUS SequenceCompletionRoutine(PDEVICE_OBJECT junk, PIRP Irp, PPOWCONTEXT ctx)
	{							// SequenceCompletionRoutine
	(void)junk;
	ctx->status = Irp->IoStatus.Status;
	HandlePowerEvent(ctx, AsyncNotify);
	IoFreeIrp(Irp);
	return STATUS_MORE_PROCESSING_REQUIRED;
	}							// SequenceCompletionRoutine
The differences are so minor that they might as well not exist. There are plenty of excellent examples of the decompiler’s abilities, but this tangent has run its course already.
There really isn’t much else to cover for these 2 supplementary drivers - ultimately, they’re just repackaged and modified versions of code written by third parties.
Back to F135usb2
Now that we’ve dealt with the firmware loader and generic driver, it’s time to get back down to business and figure out why we were getting those pesky system crashes.
Here’s a reminder of what we were faced with earlier:
After a bit of setup, my testing virtual machine was all set for debugging. A few minutes later, and round 2 of testing began…
REFERENCE_BY_POINTER (18)
Arguments:
Arg1: 00000000, Object type of the object whose reference count is being lowered
Arg2: 8d704d2c, Object whose reference count is being lowered
Arg3: 00000001, Reserved
Arg4: ee751000, Reserved
…
A bit more analysis reveals that a call to
ObfDereferenceObjectatF135usb2.sys+0x1db4is to blame.
What’s also worth noting about this bug check report is the value of “Arg4” - 0xee751000. According to WinDbg, this bug check can occur
when the object’s reference count drops below zero whether or not there are open handles to the object; in that case, [Arg4] contains the actual value of the pointer references count.
0xee751000, when interpreted as a signed 32-bit integer, is a negative number. My first thought was that a kernel structure was being corrupted, but I couldn’t find anything in the driver that could possibly cause such a thing to happen.
With F135usb2.sys under the binary microscope, let’s try to figure out what’s going on.
WARNING: Extremely technical content ahead! (But if you’ve made it this far, odds are you won’t be scared away now.)
According to IDA, the driver’s base address is 0x10000. This means that F135usb2.sys+0x1db4 refers to 0x10000+0x1db4, or 0x11DB4. Going to that address in IDA reveals the following relevant x86 assembly instructions:
.text:00011DB1 004 8D 4E 34         	lea     ecx, [esi+34h]  ; Object
.text:00011DB4 004 FF 15 7C 27 01 00	call    ds:ObfDereferenceObject
The first instruction - lea ecx, [esi+34h] - is taking the value of the esi register, adding hexadecimal 34 (or decimal 52) to it, and storing it into the ecx register. The second instruction is calling the ObfDereferenceObject function.
Some very rough pseudo-C for these 2 instructions is ObfDereferenceObject(&esi_struct->field_0x34).
Now, figuring out what the problem was took me longer than I would have liked. After staring at this code for a fairly long time, though, I finally realized what was going on. The key was to understand what lies at esi+34h, as opposed to what ObfDereferenceObject expects to be given.
IDA has a useful feature called “immediate search”, where one can search for constants and offsets used in instructions. Searching for 0x34 revealed a block of code at F135usb2.sys+0x1cef that seemed to be accessing the same field.
If you’re wondering where all of the symbol (variable/field/function) names came from, they’re based on my multi-day reverse engineering effort. This particular driver is pretty much a bunch of prewritten code glued together - some from Walter Oney’s book, some from Anchor Chips - with some Pakon-specific code on top, which made it pretty easy to figure out what the original names likely were.
if ( ObReferenceObjectByHandle(
	pRingTail->EventScanPacketReady,
	2u,
	ExEventObjectType,
	ctx->RequestorMode,
	// `EventScanPacketReady` is the field at offset 0x34 in `ctx`.
	// Corresponding instructions:
	// 		lea     ecx, [esi+34h]
	//		push	ecx
	&ctx->EventScanPacketReady,
	0u) >= 0 )
{
	// do some stuff
}
This seems like pretty clear evidence that we found the right code. Earlier I mentioned the “ObReferenceObject family of functions”, and here we see one of them being used: ObReferenceObjectByHandle. Let’s read the friendly manual!
NTSTATUS ObReferenceObjectByHandle(
  [in]            HANDLE                     Handle,
  [in]            ACCESS_MASK                DesiredAccess,
  [in, optional]  POBJECT_TYPE               ObjectType,
  [in]            KPROCESSOR_MODE            AccessMode,
  [out]           PVOID                      *Object,
  [out, optional] POBJECT_HANDLE_INFORMATION HandleInformation
);
[in] Handle: Specifies an open handle for an object.…
[out] Object: Pointer to a variable that receives a pointer to the object’s body. The following table contains the pointer types.…
So, let’s get this straight:
- The
Objectparameter is a “pointer to a variable that receives a pointer to the object’s body.” In other words, it is a pointer to a pointer, which allows the kernel to “fill in the blank”, so to speak. - The driver is passing
&ctx->EventScanPacketReadyas theObjectparameter. This is totally fine and correct!ctx->EventScanPacketReadywill be set by the kernel since we provided a pointer (or reference) to it. - When this is done,
ctx->EventScanPacketReady(note the lack of&) will be a pointer to the event object’s body.
Now, let’s look at the code that’s calling ObDereferenceObject:
void __stdcall ReleaseContextResources(PRWCONTEXT ctx)
{
  if ( ... )
  {
    ObDereferenceObject(&ctx->EventScanPacketReady);
    // ...
  }
}
and at the documentation for ObDereferenceObject…
The
ObDereferenceObjectroutine decrements the given object’s reference count and performs retention checks.void ObDereferenceObject( [in] a );
[in] a: Pointer to the object’s body.
Hold on a second. ObDereferenceObject wants a “pointer to the object’s body”, but we’re giving it &ctx->EventScanPacketReady… which is a pointer to the pointer to the object’s body. The reason the system crashes is because we’re misdirecting it. Remember this from earlier:
What’s also worth noting about this bug check report is the value of “Arg4” -
0xee751000. According to WinDbg, this bug check can occurwhen the object’s reference count drops below zero whether or not there are open handles to the object; in that case, [Arg4] contains the actual value of the pointer references count.
0xee751000, when interpreted as a signed 32-bit integer, is a negative number.
Recall that we’re supposed to provide ObDereferenceObject with a “pointer to the object’s body.” Every kernel object has a header that comes immediately before the body, and the header stores the reference count! Because we were providing a pointer to the body pointer, rather than the body pointer itself, the kernel was reading the object header from the wrong place. This explains the weird reference count.
Additionally, using WinDbg’s !object command on the supposed object body pointer (8d704d2c, from the bug check report) gives us a pretty damning error:
1: kd> !object 8d704d2c
8d704d2c: Not a valid object (ObjectType invalid)
It’s pretty obvious now that we’ve found the issue. For some reason, Windows XP’s implementation of ObfDereferenceObject doesn’t validate the object’s reference count, but that seems to have changed in Windows Vista. (This may be one of the only good parts of Vista.) Essentially, the only reason this code worked at all was an implementation detail.
The solution is almost infuriating in its simplicity: at F135usb2.sys+0x1db1, replace lea ecx, [esi+34h] with mov ecx, [esi+34h]. Thankfully, this can be done by changing a single byte: 8d 4e 34 changes to 8b 4e 34. (A more precise search-replace is: 83 7e 24 00 74 2a 8d 4e 34 -> 83 7e 24 00 74 2a 8b 4e 34)
In source-code, this would amount to changing ObDereferenceObject(&ctx->EventScanPacketReady); to ObDereferenceObject(ctx->EventScanPacketReady);. That’s right - a single rogue ampersand is to blame for the catastrophic failure.
Re-install the patched driver, try a scan, and… it just works! Luckily, the exact same patch can be applied to the drivers for the other scanner models.
At this point, I was ready to release what I had and then call it quits. I realized that a 32-bit device driver had no chance at running on 64-bit Windows, and I figured this was likely the end of the road. I had a change of heart, though, and decided to give it a shot anyway.
The 64-bit journey
Much to the chagrin of many people who wish to use very old external devices that require special drivers, Windows doesn’t provide a compatibility layer for kernel drivers like it does for normal user-facing applications with WoW64. This means that all drivers must be compiled to run on a 64-bit system. One of the major obstacles to 64-bit support is dealing with the use of “pointer-precision” data - 32-bit systems use 32-bit pointers, but 64-bit systems use 64-bit pointers, and this difference in size has a whole bunch of cascading effects.
The “obvious” solution to this problem is to just decompile the driver and recompile it, but that’s much easier said than done. It requires a complete reverse-engineering of the original code, especially anything that will end up using pointer-precision data somehow (for example, structures that store pointers.) Not one to shy away from a seemingly impossible challenge, I decided to give it a shot.
Rebuilding the firmware loader driver
My first target was the firmware loader driver - F235Ldr.sys. My goal with each driver was to get as much code to cleanly decompile as possible, and clean up the rest manually. The loader was relatively easy to deal with, as it only had 24 relatively simple functions.
Interestingly, some of the “Ezusb” functions differed slightly from the sample code that came in my kit - I guess the Pakon developers were working with a later revision. Regardless, within a couple of days I had a 64-bit version of the firmware loader that compiled successfully. After fixing a minor mistake that came about while I was trying to get rid of some deprecation warnings5, the driver sprang into action and successfully downloaded firmware to the scanner!
Rebuilding the device driver
As we discussed earlier, the Pakon device drivers consist of 2 components: Walter Oney’s “generic” driver (F235Lib.sys) and the actual device-specific driver (F*35usb2.sys.) I felt like doing things a bit differently - instead of having 2 separate drivers, I chose to merge them. I also took the liberty of using the newer version of Oney’s code, since it was readily available and presumably6 a bit more refined than the Pakon version. After a lot more decompilation and cleanup, I ran a test…
F135USB - Configuring device from Pakon
F135USB - Product is F135-USB Film Scanner
F135USB - Serial number is xxx-yyy-zz
F135USB - Device reports 3 endpoints
F135usb2 - To WORKING from STOPPED
F135usb2 - PNP Request (IRP_MN_QUERY_CAPABILITIES)
F135usb2 - PNP Request (IRP_MN_QUERY_PNP_DEVICE_STATE)
F135usb2 - PNP Request (IRP_MN_QUERY_DEVICE_RELATIONS)
Excellent! It seemed to be working - at least until I unplugged the scanner, at which point things started to go wrong. Turns out the Generic driver had a pretty subtle bug…
Unplug-and-pray
One of the many things the Generic driver takes care of is supporting Plug and Play. For the most part, this just works and I don’t need to worry about it. However, there was one thing that clearly didn’t work - whatever code ran as soon as the device was no longer available.
WinDbg helpfully informed me that something was going wrong with these two functions:
// Code is slightly modified from the original to remove some unimportant details
VOID DeregisterAllInterfaces(PGENERIC_EXTENSION pdx)
{
	// ...
	while (!IsListEmpty(&pdx->iflist))
	{
		PLIST_ENTRY list = RemoveHeadList(&pdx->iflist);
		PINTERFACE_RECORD ifp = CONTAINING_RECORD(list, INTERFACE_RECORD, list);
		DeregisterInterface(pdx, ifp);
	}
	// ...
}

VOID DeregisterInterface(PGENERIC_EXTENSION pdx, PINTERFACE_RECORD ifp)
{
	// ...
	RemoveEntryList(&ifp->list);
	// ...
}
The calls to DeregisterInterface from DeregisterAllInterfaces were failing, and bringing the entire system down with them! RemoveEntryList in particular was causing this, and figuring out why didn’t take too long: DeregisterAllInterfaces was removing an item from a list (using RemoveHeadList), and passing that item to DeregisterInterface… which then tried to remove it again. Pretty subtle, and it didn’t cause any issues in older versions of Windows, so I can understand how it went unnoticed.
Fixing this was trivial - I simply added a flag parameter to DeregisterInterface to dictate whether RemoveEntryList should be called.7 From then on, I was free to power cycle the scanner with impunity. My next test: trying to run a scan.
I can (not) has pictures?
Considering how well things had gone so far, I was sure that scanning would just work. I launched TLX (remember that?) and was perplexed by what happened. TLX has 2 status indicators, one for “Scan” and one for “Save.” Usually, the “Scan” status would start off as “Initializing Scanner” and then quickly change to “Idle”, indicating it was all ready to go. In this test, however, it got stuck on “Initializing Scanner.” Thus began a journey down yet another rabbit hole.
In the background, I had also been reversing TLB.dll in hopes of learning about the communication protocol. Thanks to the abundance of detailed error codes, I was able to assign names to a lot of functions, including some relevant to communication! I suspected that the initialization issue was likely related to communications, so I started looking for ways to see what communications were happening.
My first attempt at this was on the kernel driver side, as I already knew which function in the device driver was responsible for facilitating this type of communication. I added some code to print hex dumps of the packets, and this is what I saw:
Input buffer (client message): 04 03 10 00 85
Output buffer (scanner response): 07 02 10 00
Input buffer: 03 01 00
Output buffer: 07 02 00 09
Without context this is meaningless, but let’s compare it to the opening of a session recorded on a 32-bit system with the original drivers, using WinDbg for the logging this time:
Input buffer: 04 03 10 00 85
Output buffer: 07 02 10 00
Input buffer: 02 04 10 01 8f 00
Output buffer: 07 02 10 00
Clearly, something strange happened after the first message/response exchange of my 64-bit test. By reversing TLB’s communication code, I was able to determine the structure of the packets:
| offset | type | name | description |
|---|---|---|---|
| 0 | byte (enum) | type | Packet type |
| 1 | byte | count | Packet data length |
| 2 | bytes | data | Packet data (count bytes, up to 34) |
The basic structure of the packet data is as follows:
| offset | type | name | description |
|---|---|---|---|
| 0 | byte (enum) | address | Unknown purpose, but known possible values |
| 1 | bytes | data | Context-dependent. For scanner, the first byte of this section is a status code. |
Addresses are:
| Address | Name |
|---|---|
| 0x10 | AD_HOST |
| 0x20 | AD_PICL |
| 0x22 | AD_BOOT_PICL |
| 0x24 | AD_PICM |
| 0x26 | AD_BOOT_PICM |
| 0x28 | unknown |
| 0x40 | AD_PICL_PLUS |
| 0x42 | AD_BOOT_PICL_PLUS |
| 0x44 | AD_PICM_PLUS |
| 0x46 | AD_BOOT_PICM_PLUS |
Scanner status codes are:
| Code | Meaning |
|---|---|
| 0 | Success |
| 1 | Packet not acknowledged |
| 2 | Invalid packet |
| 3 | Invalid checksum |
| 4-6 | Something to do with USB? |
| 7 | Unknown: “EC_DRV_PacketHostErrorAlgo” |
| 8 | Success |
| 9 | Bus error |
This tells us that the 4th byte of a packet from the scanner is a status code. If it’s 0 or 8, everything is fine, but if it’s not, something’s gone wrong. Let’s look at the 64-bit test again:
Input buffer (client message): 04 03 10 00 85
Output buffer (scanner response): 07 02 10 00
Input buffer: 03 01 00
Output buffer: 07 02 00 09
The first exchange in this log is fine - the scanner replies with a status code of 0 - but in the second exchange, the scanner replies with a status code of 9. This indicates a “bus error.” Not only that, but 03 01 00 looks nothing at all like 02 04 10 01 8f 00! What happened here?
The perils of lying to the OS
I was so perplexed by this issue that I went right back into my debugger and started tracing the events that unfolded upon launching TLX. After collecting some data, I was able to identify the source of this weird packet: a function named CiCmdComm::bDrvGetPpbDeviceReadyNL8.
  // ...
  if ( CiCmdComm::bDrvOpen(this, errorHandler) )
  {
    if ( address == AD_HOST )
    {
      return 1;
    }
    else
    {
      InBuffer.type = PH_READ_STATUS;
      InBuffer.count = 1;

      // address is junk!!!
      InBuffer.address = address;

      // start a busy loop, sending this packet repeatedly!
    }
    // ...
  }
Note the comment about address being “junk” - recall that the third byte of every packet is an “address”, and 00 does not correspond to a valid address! The question is… where did 00 come from?
Working my way down the stack, I found that CiCmdComm::bDrvGetPpbDeviceReadyNL was being called from a function named CiCmdComm::bDrvWritePacketNL:
int __thiscall CiCmdComm::bDrvWritePacketNL(CiCmdComm *this, CiErrorHandler *errorHandler, PPB_REQUEST *requestPacket)
{
  // ...
  while ( CiCmdComm::bDrvPacketExecuteNL(this, errorHandler, requestPacket, &responsePacket) )
  {
    // ...
    {
      // ...
      if ( !CiCmdComm::bDrvGetPpbDeviceReadyNL(this, errorHandler, requestPacket->address, &responsePacket.status)
        || !CiCmdComm::bDrvPacketHandleErrorNL(
              this,
              errorHandler,
              requestPacket->address,
              requestPacket,
              &responsePacket,
              &v13,
              &v10) )
      {
        break;
      }
	  // ...
    }
	// ...
  }
  CiErrorHandler::LogError(errorHandler, this->classId, FN_bDrvWritePacketNL, EC_PreviousError, 0, 0, 0);
  return 0;
}
At this point, I realized I was going to have to get more precise with my debugging if I wanted to figure out exactly where things were going wrong. My first revelation was that the call to CiCmdComm::bDrvPacketExecuteNL was corrupting the requestPacket!
In CiCmdComm::bDrvWritePacketNL, the requestPacket started out totally valid:
Stack[00001CDC]:04F8FD58 db 4       ; packet type: PH_CMD
Stack[00001CDC]:04F8FD59 db 3       ; data length: 3 bytes
Stack[00001CDC]:04F8FD5A db 10h     ; address: AD_HOST
Stack[00001CDC]:04F8FD5B db 0       ; unknown
Stack[00001CDC]:04F8FD5C db 85h     ; unknown
but oddly, after CiCmdComm::bDrvPacketExecuteNL was called, the first 4 bytes vanished!
Stack[00001CDC]:04F8FD58 db 0		; packet type: PH_INVALID (0)
Stack[00001CDC]:04F8FD59 db 0		; data length: 0 bytes
Stack[00001CDC]:04F8FD5A db 0		; address: undefined (0)
Stack[00001CDC]:04F8FD5B db 0		; unknown
Stack[00001CDC]:04F8FD5C db 85h		; unknown
Next, I stepped through CiCmdComm::bDrvPacketExecuteNL, and discovered that the data corruption was happening after the driver had finished processing the request. CiCmdComm::bDrvPacketExecuteNL uses a function named DeviceIoControl to send packets to the driver, and immediately after the call to DeviceIoControl, I observed the data corruption!
int __thiscall CiCmdComm::bDrvPacketExecuteNL(
        CiCmdComm *this,
        CiErrorHandler *errorHandler,
        PPB_PACKET *requestPacket,
        PPB_PACKET *responsePacket)
{
  // ...
  if ( !DeviceIoControl(
          *this->pDeviceFileHandle,
          0x222090u,                // IO control code for packet exchange
          requestPacket,            // Input buffer
          requestPacket->count + 2, // Size of input buffer
          responsePacket,           // Output buffer
          0x40u,                    // Size of output buffer
          &numBytesReturned,
          &this->m_DriverOverlappedPPB) )
  {
	// error handling
  }
  // ... a bunch of other stuff
}
Notice the “size of output buffer” supplied to DeviceIoControl - 0x40, or 64. Therein lies the problem - the structure used for responsePacket is only 36 bytes in length. As a result of this inconsistency, something (possibly the USB stack) was zeroing out memory that it really shouldn’t have, which ultimately led to the strange packet we saw!
I have no clue how this code ever worked (thanks, implementation details…), but that’s beside the point. After making another one-byte patch to fix this, I was delighted to see TLX progress from “Initializing Scanner” all the way to “Idle” as I had hoped for!
The final frontier - scanning
It turned out that I wasn’t quite out of the woods yet - attempting to run a scan resulted in a mysterious error.
CN_CiScanner FN_bCalibrateEndDataFlow EC_WIN_GetOverlappedResult (177) The parameter is incorrect.
CN_CiScanner FN_bCalibrateFindCorrections EC_PreviousError (25) 0
CN_CiScanner FN_bBeforeScan EC_PreviousError (25) 0
CN_Global FN_FuncScanPictures EC_PreviousError (25) 0
CN_Global FN_FuncScanPictures EC_PreviousError (25) 0
My driver reported a similar issue:
F135USB - RingPacketComplete:103 [ERROR]: Ring packet info has failing status: 80000300 (USBD_STATUS_INVALID_PARAMETER)
I couldn’t figure out where this status code was even coming from at first, but the name gave me a hint: it had something to do with the USB stack. I eventually realized that I had failed to recognize a certain data structure for what it really was, and that some of my driver code was almost certainly incorrect as a result. Ironically, this idea came to me just as I was going to sleep. When I got up the following morning I updated the driver to account for my discovery, crossed my fingers, and clicked the “scan” button for the millionth time…
…and it worked! After the equivalent of a full work week dedicated to these custom drivers, they finally worked - not just on Windows 10, but Windows 11 too. Some extra tweaks were necessary to prevent various crashes, like one that only occurred when a USB 3.0 controller was being used, as well as to fix some issues detected by the Driver Verifier.
The end
In the course of this article, the Pakon film scanners went from being a user’s nightmare to being totally usable with modern versions of Windows. While not all of the Pakon client software has stood the test of time - the PSI application, for example, isn’t 100% functional - this opens the door for so much more development, potentially including a new scanning client.
There’s a lot that I didn’t discuss in this article, including a lot of the details of my reverse engineering process. In the future I might write an article specifically about that, as I learned a lot of valuable information about how the scanner really works that I think is well worth sharing.
If you made it this far, I applaud you. Thanks for reading!
-
I’m intentionally omitting discussion of the early days of film photography, partly because I’m not the most educated in that area, but also because we’re talking about minilabs here. ↩
-
One such post-processing technique is known as “Digital ICE” (ICE stands for “Image Correction and Enhancement”), and it’s really cool. This excellent video goes into more detail about how it works. ↩
-
That’s right, we’re talking about C now. Don’t be afraid, it won’t get too horrible. ↩
-
Anchor Chips was acquired by Cypress Semiconductor in 1999. Cypress Semiconductor was itself acquired by Infineon Technologies in 2020. At this rate, we can expect Infineon Technologies to be acquired in 2041. ↩
-
Older drivers typically use a function called
ExAllocatePoolWithTagto perform memory allocations, with the “tag” being an identifier of some sort for the allocation. In the latest versions of Windows, this function is deprecated in favor of a new one calledExAllocatePool2, which has a subtly different signature. I did not account for this at first, and as a result, every single memory allocation was doomed to fail. ↩ -
I didn’t realize what was coming. ↩
-
I later came up with a slightly more elegant solution, but elegance is not really important at this point. ↩
-
My interpretation: “Drv” means “Driver”, “Ppb” refers to the protocol (this is heavily implied in various places), and “NL” means “no lock” (i.e., not using a mutex or spin lock or any form of concurrency control - this aligns with the code) ↩